Pressure transmitter setup: pre-installation data checklist
A pressure transmitter can be electrically perfect and still be the wrong instrument for the job.
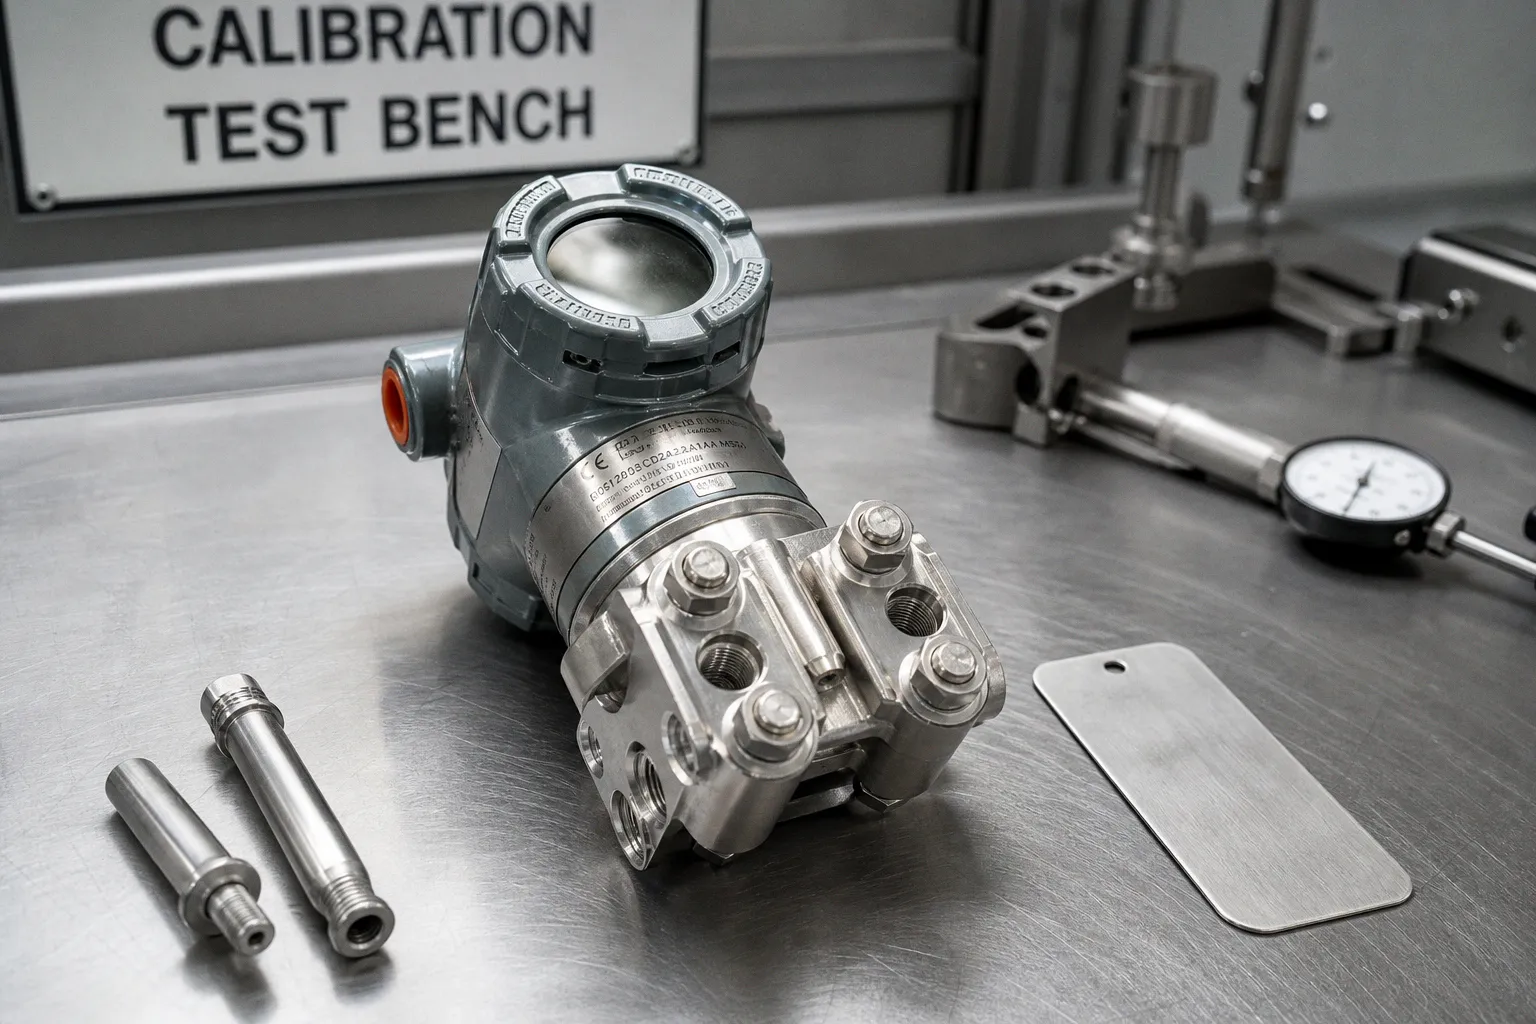
The failure often begins before installation: a substituted model, an unchecked process connection, an operating range chosen from the line’s nominal pressure, or an impulse line routed according to whatever space happened to be left on the rack.
That is why an industrial pressure transmitter installation checklist should begin with data, not tools. Before anyone reaches for a wrench, I want the transmitter, the P&ID, the datasheet, the hook-up drawing, and the actual process conditions on the same page. When they are not, the installation is already carrying risk, even if the loop eventually powers up and the SCADA screen displays a plausible number.
The audit below is the one I use before the mount. It is not a substitute for the manufacturer’s installation manual or the project specification. It is the practical layer between those documents and the equipment waiting in the crate.
Verifying instrument specifications against P&ID and datasheets
The instrument that arrives on site is not always the instrument that was specified. Procurement substitutions, stock shortages, package-vendor changes, and supposedly equivalent models can alter the installation requirements without changing the tag number on the drawing.
The first question is simple: is the device in front of me actually the device described by the project documents?
I verify the following before removing protective packaging:
- Tag number, manufacturer, model, and configuration code. The full ordering code matters. Two transmitters may share a product family while differing in pressure range, electronics, process connection, approvals, or wetted materials.
- Measurement type. Gauge, absolute, vacuum, compound, and differential pressure transmitters are not interchangeable simply because their ranges appear similar.
- Range and calibrated span. Record the lower and upper range values, not only the nominal pressure class. A transmitter configured for a narrow span may behave differently from the same model ordered with a broad span.
- Process connection. Check the pressure sensor process connection types against the hook-up: thread form, nominal size, flange rating, facing, diaphragm-seal arrangement, and adapter requirements. NPT, BSP/G, metric threads, and flange connections are not interchangeable by appearance.
- Output and communication protocol. A conventional 4–20 mA device, a HART-enabled loop instrument, WirelessHART equipment, Foundation Fieldbus, and Profibus variants require different wiring and commissioning arrangements.
- Wetted materials and fill fluid. Confirm diaphragm, flange, gasket, O-ring, and seal materials against the process medium, concentration, temperature, and cleaning method.
- Hazardous-area and environmental approvals. The certificate, protection method, enclosure rating, and permitted cable-entry arrangement must match the location, not merely the equipment list.
- Electrical supply and load requirements. The loop power budget, barrier or isolator, cable length, and input-card compatibility belong in the pre-installation review.
- Optional features that affect mounting. Remote seals, capillaries, manifolds, impulse-line accessories, display housings, and temperature extensions can change the physical arrangement considerably.
The nameplate is the starting point. The purchase order is not a reliable substitute for it, and neither is a photograph from the vendor’s quotation. I compare the physical device with the instrument index, P&ID, datasheet, hook-up drawing, and, where applicable, the approved vendor drawing.
If the nameplate, P&ID, datasheet, and hook-up drawing disagree, stop the installation before the disagreement becomes metalwork.
This is not paperwork for its own sake. A change in process connection can require a different gasket or adapter. A change in wetted material can alter media compatibility. A change from gauge to absolute pressure can make a perfectly stable signal answer the wrong question. The instrument may still communicate normally, which is precisely why these errors can survive a superficial loop check.
Read the process conditions as a set, not as isolated numbers
The pressure value printed in a line list is only one part of the operating envelope. I also want to see:
- normal, minimum, and maximum operating pressure;
- expected start-up, shutdown, and cleaning conditions;
- pressure surges, pulsation, water hammer, and pump transients;
- process and ambient temperature at the intended mounting point;
- vacuum exposure or vacuum-break events;
- density and phase behavior where hydrostatic head affects the reading;
- corrosive, abrasive, crystallizing, polymerizing, or viscous characteristics;
- whether the line is normally full, intermittently full, or subject to gas or liquid pockets;
- the required accuracy, response time, damping, and diagnostic behavior.
The pressure transmitter is not selected for one steady-state number. It is selected for a process that changes state. A line that runs comfortably inside the range during normal production may still impose a damaging transient during valve closure or pump start. Conversely, a broad range chosen only to survive a theoretical maximum can leave the actual measurement compressed into a small part of the span.
The electrical review belongs here as well. Confirm the intended cable type, shield and grounding arrangement, polarity, terminal assignment, loop resistance, intrinsic-safety barrier or galvanic isolator, and the input-card configuration. A correct transmitter connected to an incompatible loop can produce a commissioning problem that is wrongly diagnosed as an instrument fault.
Optimizing operating ranges and process connection geometry
Range selection is where a specification can look safe while quietly compromising the measurement. The usual target is to keep normal operation comfortably inside the calibrated span rather than close to either endpoint. A rule of thumb such as 60–70% of span can be a useful starting point, but it is not a universal design law. Accuracy, turndown, overload rating, static pressure, transient behavior, and the transmitter’s own specifications all matter.
I ask three separate questions:
1. Where does the process normally operate?
2. What pressure can the transmitter see during credible transients?
3. What span gives the required resolution and accuracy without making overload events routine?
A 0–100 bar transmitter on a line that normally operates around 85 or 90 bar may technically include the operating point, but it leaves little room for a surge. The opposite mistake is just as common: selecting a very broad range for a process that normally moves through only a narrow pressure band, then discovering that small but important changes are difficult to distinguish.
The datasheet’s overpressure limit is not a recommended operating zone. It describes what the device may withstand under specified conditions, often with qualifications concerning duration, temperature, static pressure, or accuracy recovery. It should not be treated as a convenient extension of the measuring range. Repeated pressure spikes can affect zero stability, response, or diaphragm life, but the extent is model- and service-specific. Do not invent a fatigue schedule from a generic MTBF figure: MTBF is not a model-specific limit for overpressure cycles.
Geometry can change the reading before the electronics see it
The pressure sensor itself may be accurate while the installation introduces a pressure that is not representative of the process. Elevation between the tap and the transmitter creates hydrostatic head. In a liquid service, that head can be significant relative to a low-pressure measurement. In a gas service, the effect may be smaller, but condensation, temperature gradients, and trapped liquid can still matter.
Before fixing the transmitter location, establish whether the specified pressure is:
- pressure at the process tap;
- pressure at the transmitter connection;
- pressure corrected for liquid head;
- differential pressure across a defined pair of taps;
- or a value expected to be compensated in the control system.
The same physical transmitter can therefore require a different mounting arrangement depending on the measurement objective. A local gauge-pressure measurement on a liquid line is not laid out in the same way as a differential-pressure measurement on a steam drum or a flow application.
Orientation also needs a more careful treatment than “vertical is always correct.” Some transmitters, diaphragm seals, manifolds, and impulse-line arrangements have preferred orientations. Others permit several mounting positions but require a zero check or zero trim after installation. Changes in orientation can affect the displayed zero because of sensor construction, fill-fluid behavior, static head, or mechanical stress; the effect is model-specific. The manufacturer’s manual and the approved hook-up drawing take priority.
On a vibrating line, orientation is only one part of the problem. The transmitter should be kept away from the strongest vibration where possible, supported independently from flexible tubing, and connected through a layout that does not turn the impulse tubing into a mechanical lever. If the process connection itself is moving, no orientation trick will make the installation stable.
Process connection and seal selection
A process connection is not just a hole through which pressure enters. It is a pressure boundary, a contamination path, and often the first place where installation damage appears.
Confirm:
- thread standard and engagement;
- flange class, facing, and bolt pattern;
- diaphragm clearance from the pipe or nozzle;
- gasket material and dimensions;
- whether a flush connection is needed;
- whether the medium can crystallize, settle, plug, or polymerize at the port;
- whether an isolation valve, manifold, flushing connection, or blowdown arrangement is required.
For tapered threads, the sealant must be selected for the actual service. PTFE tape is not automatically forbidden and it is not automatically appropriate. Oxygen, chlorine, reactive chemicals, high-purity service, and aggressive cleaning regimes may impose specific cleanliness and sealing requirements. Tape can also shed fragments or be applied in a way that interferes with the diaphragm. In other services, a compatible thread sealant may be acceptable. The decision belongs to the medium, temperature, pressure, cleanliness standard, connection design, and manufacturer’s guidance—not to a universal rule.
Do not use sealant as a way to compensate for mismatched threads. It cannot turn one thread standard into another, and it cannot repair a damaged sealing face.
Thermal management and ambient temperature derating protocols
Temperature is often checked at the process line and forgotten at the transmitter. That is a mistake. The housing may sit in direct sun, beside a hot pipe, inside a heated enclosure, or in a location where nearby equipment radiates more heat than the ambient-air reading suggests.
The relevant temperatures include:
- process temperature at the connection;
- temperature transmitted through the neck, flange, manifold, or capillary;
- actual ambient temperature at the housing;
- solar loading and enclosure temperature;
- minimum temperature during shutdown;
- temperature during steam-out, cleaning, draining, or tracing;
- and the permitted temperature of the electronics, seals, fill fluid, and display.
A transmitter’s published ambient range is conditional on the rest of its configuration. Remote seals, extended necks, cooling elements, capillaries, and process adapters can change the permissible combination of process and ambient temperatures. Some models specify a derating relationship; others provide separate limits for the process connection, electronics, seals, and hazardous-area approval.
For example, a manufacturer may specify a particular process-to-ambient derating rule for one model and one configuration. That relationship cannot be transferred to another transmitter by analogy. If the manual gives a 1:1.5 reduction above a stated process temperature, use that formula only for the configuration to which it applies, and document the calculation. If the manual does not provide a relationship, do not manufacture one from a generic temperature range.
| Question | What to establish before mounting |
|---|---|
| Process connection temperature | The temperature the transmitter flange, diaphragm, or adapter will actually experience |
| Housing ambient | The highest and lowest temperature at the electronics location, including sun and enclosure effects |
| Transient exposure | Whether start-up, shutdown, cleaning, tracing, or steam-out creates a short-term excursion |
| Thermal protection | Whether a remote seal, extended neck, cooling element, or relocation is required |
| Approval limits | Whether the proposed temperature remains within the certified configuration |
| Commissioning condition | Whether zero trim or verification must be performed after the instrument reaches operating temperature |
A cooling fin or heat extender may help, but it is not a universal cure. Its effectiveness depends on orientation, air movement, process temperature, material, and the manufacturer’s permitted arrangement. Moving the transmitter away from the hot point is sometimes the cleaner solution.
For steam and other hot condensable services, a condensate seal or cooling leg may protect the transmitter from direct exposure to high-temperature steam. It may also create a stable hydrostatic head, but that does not automatically make it a reference leg for every measurement. In differential-pressure service, equalized condensate legs can be part of the measurement design. In an ordinary gauge-pressure installation, a water or condensate column is not inherently a reference leg for differential calculation. The function of the seal must be defined by the measurement arrangement.
For high-temperature steam service, the impulse line or condenser must be prepared before the transmitter is exposed to the process. Pre-inject more than half a tube of cooling water into the impulse line or condenser, as required by the installation arrangement. The purpose is to establish a cooling column and prevent hot steam from reaching the sensing element directly during start-up. This is not a casual fill operation: the line must be clean, correctly routed, and protected against conditions that could drain the cooling water or leave the transmitter exposed.
Thermal protection is part of the measurement design, not an accessory added after the transmitter has already been exposed to the process.
Mechanical mounting standards and flange integrity requirements
A transmitter should be accessible, supported, and protected from avoidable mechanical loads. There is no universal pillar height that overrides the project layout or the manufacturer’s mounting instructions. The correct elevation is the one that preserves the required impulse-line geometry, allows safe access, avoids flooding or freezing, and leaves room to remove the instrument without dismantling half the plant.
I look for four practical conditions:
- the display and terminal compartment can be reached safely;
- the transmitter is not hanging from rigid impulse tubing;
- the mounting bracket is attached to a structure capable of carrying vibration and service loads;
- the process connection, manifold, and drain or vent points remain accessible for commissioning and maintenance.
A low mounting point may allow liquid to collect. A high point may trap gas in a liquid service or make calibration unsafe. The right answer depends on the phase, the tap location, ambient conditions, and the need to drain or vent the line.
Flanges, gaskets, and fasteners
Flanged installations fail through small inaccuracies: a gasket that intrudes into the sensing path, a damaged flange face, uneven bolt tightening, incompatible materials, or a transmitter forced into alignment by the bolts.
Before assembly:
- clean the flange faces without scratching them;
- verify gasket dimensions and material;
- make sure the gasket does not obstruct the diaphragm or flush port;
- inspect bolts, nuts, washers, coating, and required torque;
- align the transmitter without using the fasteners to pull the pipework into position;
- tighten in the specified sequence and to the specified torque;
- check for leakage after pressurization using the approved method.
For the specified flange arrangement, flange bolts must extend 5–10 mm beyond the nut face after tightening. That projection is part of the verified installation requirement, not an optional visual preference. It still has to be achieved with the correct bolt length, washer arrangement, thread engagement, nut, flange thickness, gasket, and project standard. If the projection cannot be obtained without compromising thread engagement or the required assembly, stop and resolve the fastener selection rather than accepting a nearly correct assembly.
The bolt projection does not replace torque control. A bolt extending beyond the nut may still be under-tightened, over-tightened, unevenly loaded, or damaged. Conversely, a correct torque value does not excuse the use of a bolt that is too short for the flange stack. Both conditions belong in the inspection.
Do not install a gasket by eye when the hook-up or flange standard specifies a particular type. A gasket that enters the pressure port can restrict the opening, create a dead pocket, or become a source of contamination. On diaphragm-seal or flush-mount connections, even a small misalignment can change the behavior of a difficult medium.
Mounting hardware and environmental exposure
The bracket is part of the installation, not packaging that happens to remain under the transmitter. Check the material, coating, fastener compatibility, drainage, and resistance to the site environment. Outdoor equipment may see rain, salt, chemical vapors, washdown, ice, and vibration. A mounting arrangement that is mechanically adequate indoors can deteriorate quickly in an exposed area.
Cable entries should face a direction that prevents water from being led into the enclosure. Where the housing orientation is adjustable, preserve the manufacturer’s sealing arrangement and do not rotate the body beyond the permitted range. Unused entries need the specified plugs, and cable glands must match the protection method and cable diameter.
The electrical connection deserves the same discipline as the pressure boundary. Verify polarity, terminal identification, shield termination, grounding, and segregation from power and high-noise circuits. A shield is not automatically grounded at every available point. The correct arrangement depends on the project standard, signal architecture, hazardous-area design, and equipment instructions.
Impulse line preparation and flow disturbance mitigation
Impulse tubing is often treated as secondary hardware. In practice, it is part of the sensor. Its internal condition, slope, length, routing, support, and temperature determine whether the transmitter receives a representative and stable pressure.
The pressure tap itself is the first decision. If a pressure tap and a temperature sensor share the same pipe, the pressure tap must be located upstream of the temperature sensor. This arrangement prevents the temperature-sensor installation from disturbing the pressure measurement point and follows the required sequence for the shared pipe. Do not replace that requirement with a general statement that upstream placement is merely preferred or that the final position is open to interpretation.
The tap also needs to be located where the process is representative rather than immediately beside a source of turbulence. Valves, elbows, reducers, tees, pump discharges, and other fittings can create local pressure patterns that do not represent the bulk line condition. The applicable P&ID, piping design, instrument standard, and manufacturer’s guidance determine the acceptable arrangement. The key is to avoid treating a convenient nozzle as automatically suitable.
Slope, phase, and pockets
The correct impulse-line layout depends on the process phase:
- In liquid service, the line should not create high points where gas can collect if gas pockets would affect the reading.
- In gas service, avoid low points where condensate can accumulate and form an unintended liquid seal.
- In steam service, maintain the specified condensate arrangement and protect both legs from unequal temperature conditions.
- In viscous, crystallizing, or polymerizing service, consider whether a conventional narrow impulse line will plug before the transmitter can be maintained.
- In corrosive service, confirm that tubing, fittings, valves, gaskets, and seal materials are compatible with the actual medium, not only with a generic service name.
A line that is technically connected can still be hydraulically wrong. An impulse tube with an unnecessary long loop adds volume, slows response, and creates more places for condensation or contamination. A tube pulled tight between two rigid points can transfer vibration into the transmitter. A tube with no support can move under pulsation and fatigue at the fitting.
Route the tubing with enough flexibility for thermal movement but without loose unsupported spans. Protect it from impact, hot surfaces, freezing conditions, and accidental use as a step or handhold. Keep the route visible enough for inspection and provide access to isolation, equalizing, vent, and drain valves.
Isolation, manifolds, and commissioning
A manifold or valve set should be installed so that its operating positions are clear and its vents or drains can be used safely. The technician must be able to isolate the transmitter, equalize pressure where applicable, release trapped pressure, and perform a functional check without improvising at the pipe.
Before opening the process connection, confirm:
- the line has been isolated and depressurized according to the site procedure;
- the impulse line and manifold are clean;
- temporary caps, plugs, and shipping materials have been removed;
- the valves are correctly oriented and tagged;
- vent and drain outlets are directed to a safe location;
- the transmitter diaphragm has not been exposed to an unsuitable cleaning fluid;
- the final valve lineup is recorded before the loop is returned to service.
Flushing can be useful, but it must not send debris directly into a delicate diaphragm or seal assembly. Where the process can solidify or leave deposits, the installation may need a flushing connection or a different sensor arrangement. That decision should be made before the transmitter is mounted, not after a plugged impulse line has become a recurring maintenance fault.
Pulsation and flow disturbance
A pressure transmitter does not need to reproduce every mechanical fluctuation in a pump discharge line. If pulsation is part of the process and the control system needs a stable signal, the installation may require a snubber, restrictor, damping function, or a different tap location. Each solution changes response time and should be selected against the control objective.
Do not hide a poor tap location behind aggressive damping. Damping can reduce visible oscillation while leaving the sensor exposed to damaging pressure cycles. It can also delay an alarm or control response. First resolve the mechanical source of the disturbance where possible, then configure damping deliberately.
The same applies to cavitation and flashing. A pressure tap near a pump or control valve may see a pressure field that changes with operating point. If the process can flash in the impulse line, the measurement may become unstable and the line may suffer from erosion or blockage. The transmitter datasheet cannot correct for a process connection that was placed in the wrong hydraulic environment.
The electrical connection is part of the installation
The pressure transmitter electrical connection should be reviewed before the instrument is bolted into a crowded rack. Confirm the terminal arrangement from the actual model manual, not from a similar device in the same product family. Check whether the device requires a minimum loop resistance for communication, whether polarity is protected, and whether the enclosure must be opened under specific area conditions.
The cable route should preserve signal integrity and maintain the separation required by the project. Power cables, variable-frequency-drive outputs, solenoids, and high-current conductors can introduce noise into an analog loop. Shielding and grounding should follow the approved design rather than a local habit.
For hazardous areas, the complete circuit matters: transmitter certification, barrier or isolator, cable parameters, gland, enclosure, and earthing arrangement. Installing an approved transmitter with an unapproved cable entry does not create an approved installation.
Before energizing, compare the field termination with the loop drawing and perform continuity and insulation checks where the procedure requires them. After energizing, confirm the actual supply at the transmitter terminals under load. A voltage measured at the cabinet does not prove that the instrument has the required voltage at the end of the installed cable.
The first signal should also be interpreted in context. A plausible current value does not prove correct range configuration, correct polarity, correct pressure type, or correct process connection. Verify the engineering units, lower and upper range values, damping, alarm behavior, square-root extraction where applicable, and communication settings before accepting the loop check.
Media compatibility is more than a wetted-parts list
Pressure sensor media compatibility is frequently reduced to the diaphragm material. That is too narrow. The process can contact or influence diaphragms, seals, gaskets, fill fluids, flange surfaces, impulse tubing, valve trim, thread sealant, and cleaning residues.
Review the complete exposure:
- normal process composition and concentration;
- contaminants, water content, solids, and additives;
- operating and cleaning temperature;
- oxygen or other special-service cleanliness requirements;
- potential for corrosion under deposits;
- permeation, swelling, embrittlement, or stress cracking;
- compatibility during flushing and preservation;
- and the consequences of a small leak at the selected connection.
A material that is acceptable for a dry medium may behave differently when moisture or a cleaning chemical is present. A gasket that survives the process temperature may still be unsuitable for the chemical composition. A fill fluid that is acceptable in one application may require review where contamination of the process cannot be tolerated.
If compatibility is uncertain, the correct response is to return to the manufacturer’s materials data and the process chemistry, not to rely on the broad label “corrosion-resistant.” The process connection is the point at which a catalog choice becomes a real pressure boundary.
What should be resolved before the transmitter reaches the rack
A useful pre-installation review ends with decisions, not a collection of unchecked documents. I want the following questions answered in writing or on the approved drawings:
- Is the delivered model and full configuration code correct?
- Does the measurement type match the control and indication requirement?
- Are normal conditions, transients, vacuum exposure, and temperature excursions known?
- Is the selected span appropriate for the actual operating point?
- Are the process connection, flange, gasket, seal, and wetted materials compatible?
- Is the pressure tap in the required location, including upstream placement relative to a shared-pipe temperature sensor?
- Does the mounting position preserve the intended hydrostatic relationship?
- Is thermal protection provided where high process temperature requires it?
- For high-temperature steam, has more than half a tube of cooling water been pre-injected into the impulse line or condenser?
- Do flange bolts extend 5–10 mm beyond the nut face after assembly?
- Can the technician isolate, vent, drain, calibrate, and remove the instrument safely?
- Does the electrical loop match the transmitter output, hazardous-area design, cable route, and input card?
- Has the final valve lineup and commissioning condition been defined?
These are not separate administrative questions. They describe one system. A range mismatch can be made worse by hydrostatic head. A suitable diaphragm can be defeated by an incompatible gasket. A correctly wired transmitter can still report the wrong pressure because the impulse line is full of gas, condensate, or debris. A good flange can leak because the transmitter was forced into alignment or the fasteners were selected without checking projection.
The installation is ready when the physical arrangement, process conditions, mechanical details, and electrical design tell the same story. If one document says gauge pressure, another shows differential pressure, and the transmitter nameplate suggests something else, the answer is not to continue and see what the display does. Stop, resolve the discrepancy, and only then put the instrument into service.
A pressure transmitter is a small device at the end of a much larger chain of assumptions. The pre-installation review is where those assumptions become explicit. That is why the best industrial pressure transmitter installation checklist is not a pile of generic inspection points. It is a disciplined comparison between the process that actually exists, the instrument that was actually delivered, and the installation the drawings actually require.