Industrial pump installation: essential site preparation steps
walked into pump rooms that cost more than my last three audits combined, and the failure was never exotic.
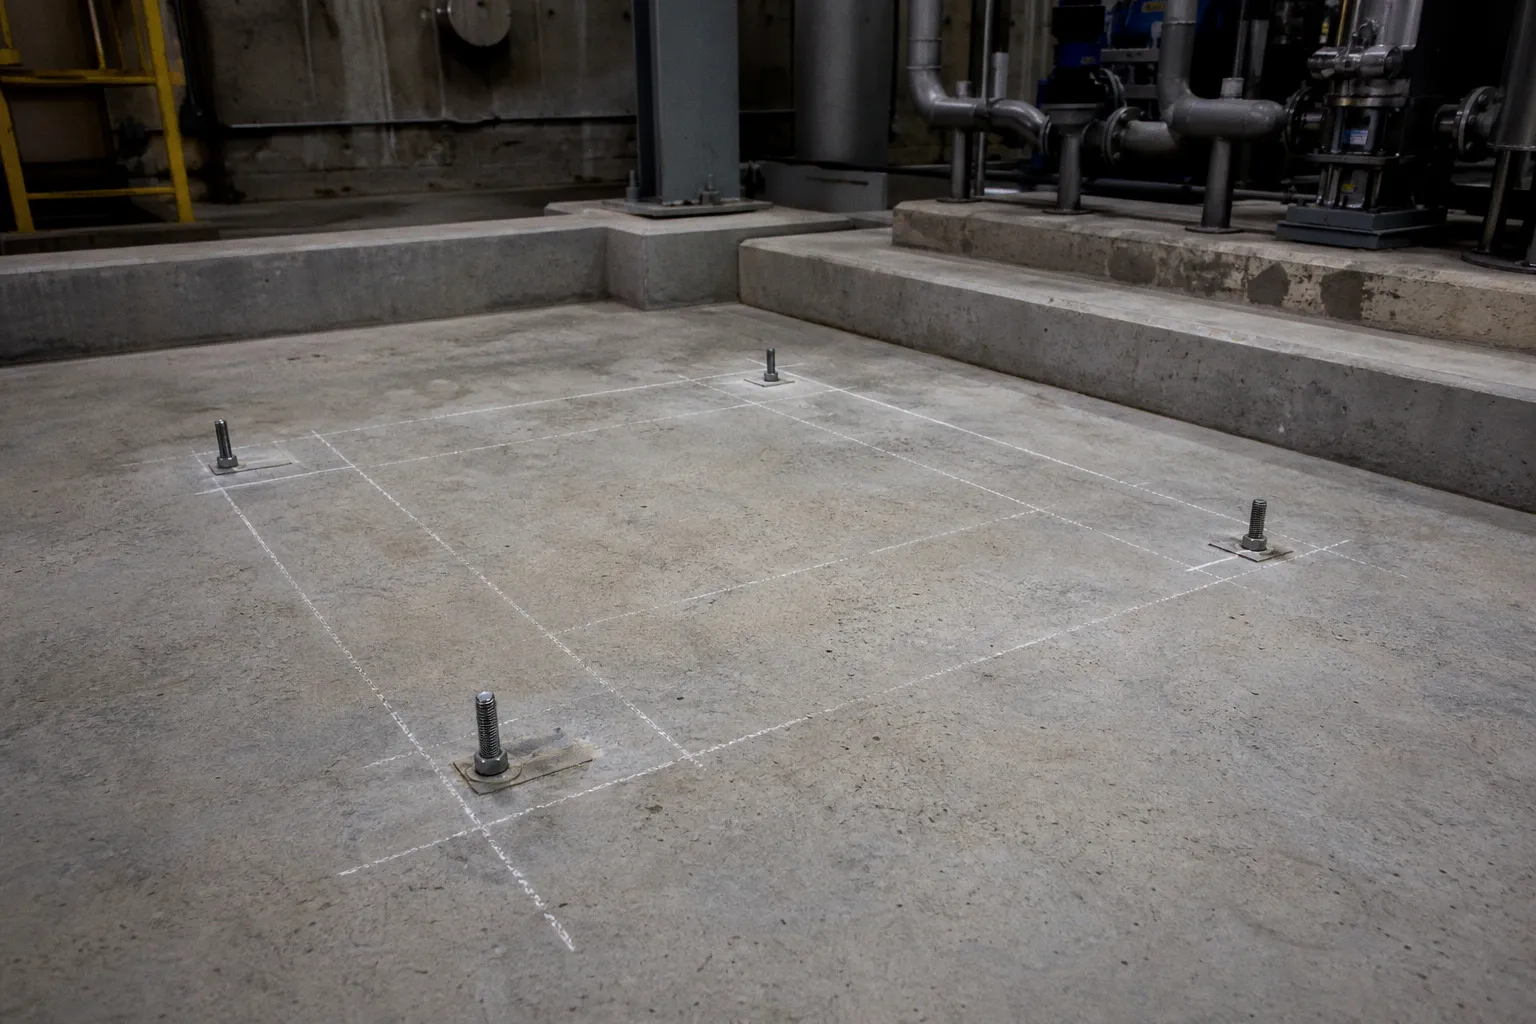
It was always the same unglamorous culprits: a baseplate that wasn't really level, a suction line that pinched air, a pipe fitter who "forced it." Most pump failures I see in audits trace back to installation, not the pump. The OEM ships you a precision machine; the site crew treats it like a bucket of bolts. Industrial pump installation requirements checklists exist for one reason: to keep people from doing what they always do.
This guide is the route map I wish every contractor had before they broke ground on a foundation pad. I'll walk through what the OEM manuals actually demand — foundation rigidity, baseplate leveling, grout procedures, shaft alignment timing, suction-line geometry, drainage, energy isolation — and where the manual quietly punts to a site-specific engineering call. Treat the steps as a checklist if you want. I wrote them as an audit pattern, because that's how I think.
Foundation Integrity and Baseplate Leveling Protocols
The foundation is the boring half of the job, which is exactly why it gets botched. A pump is a precision machine running at speed; the foundation is the only thing keeping resonance, vibration, and misalignment from compounding into bearing failures and seal leaks. Manufacturer manuals I've worked with treat foundation rigidity and baseplate leveling as the non-negotiable first move, before a single pipe is roughed in.
Foundation first, anchor bolts second. You don't drop a pump on a fresh slab and start torquing. The foundation has to cure, the embedment depth has to match the engineered drawing, and the concrete strength has to carry the combined dead load plus the dynamic loads of the pump and driver. Anchor-bolt size, grade, embedment, and torque values are not universal — they're selected by the project engineer based on pump mass, driver weight, soil or structural capacity, and the OEM's certified drawing. If your installer is pulling numbers from a video on their phone, you've already got a problem before the grout hits the floor. The same goes for over-spec'd foundations that add bloat to the pour without buying anything structural.
Leveling with shims, not hope. Before grouting, the unit gets leveled using steel wedges or shims placed on both sides of each anchor bolt. The cited manufacturer guidance is unambiguous: the shim width must be at least the base-rail width, and the shim length at least four times the anchor-bolt diameter. That length isn't decorative — it's what keeps the shim from folding under the baseplate when you torque the bolt down. Wedge pairs are stacked to bring the baseplate into the design elevation before grout is poured.
Grout is not filler. High-precision non-shrinking grout goes inside the pump baseplate, but only after the pump unit has been leveled, securely bolted to the floor, and properly aligned. The cited frame-mounted installation guidance I work from specifies a baseplate-to-foundation gap in the range of roughly 19 to 64 mm (3/4 to 1-1/2 in.) and a leveling allowance of about 13 to 19 mm (1/2 to 3/4 in.) above the floor. Those figures are from one cited manual; they're not universal across every pump model, so reconcile them with the OEM IOM and the grout manufacturer's data sheet. In one cited Goulds manual, four foundation bolts are not fully tightened until the grout has cured — and the cited cure time is 48 hours. After 48 hours you final-torque, then you re-check alignment. The order matters.
Grout is structural. If you're using it to hide a bad leveling job, you're installing a future vibration problem.
Strategic Pump Placement and Environmental Considerations
Where the pump sits in the room decides what fights it has later. A lot of sites pick the spot last, after the building has already decided where the trenches, drains, and cable trays go. That's backwards. The cited manufacturer guidance recommends locating the pump as near to the liquid source as practical — long suction runs cost you NPSH and buy you nothing.
Drainage or it's not a location. Frame-mounted pump installations have to provide adequate drainage or be located where a leak cannot damage other equipment or property. The cited manufacturer manuals are explicit: do not install above equipment or property without adequate drainage underneath. A leak in a pump room that drips onto a six-figure motor control cabinet is a different category of problem than a leak that drips onto a concrete floor with a trench drain. Choose accordingly. This is the part of pre-installation pump site inspection that gets skipped because nobody wants to cut a floor.
Freezing, ventilation, and service access. Protect the pump and piping from freezing if there's any chance the ambient goes below the liquid's freezing point — and that includes the suction line, the discharge line, and any drain or vent points. Leave adequate space around the unit for service and ventilation. Pumps dump heat into the room; if the room can't reject it, motor windings cook. Service access isn't a luxury — it's how the seal gets replaced without ripping out piping. If a tech can't stand in front of the coupling with a dial indicator, the alignment was never going to be done right anyway.
Hot-surface awareness. The cited Lowara e-IXPS manual puts the threshold at 60°C (140°F): once the pumped liquid temperature crosses that, the unit has to be isolated before anyone touches it. That's not advisory. Burn injuries are some of the most preventable incidents in industry, and they're also the ones where "we'll just be quick" becomes an incident report.
Suction Piping Geometry and Flow Optimization
This is where I see the most confidently wrong decisions on site. Suction piping is not "just pipe." Every elbow, every reducer, every valve on the suction side either preserves or destroys the pump's ability to feed itself. Get it wrong and you get cavitation, loss of prime, vibration, and a premature seal death that everyone then blames on the seal vendor.
Short, direct, and at least as large as the suction connection. The cited manufacturer manuals are consistent: suction piping should be short, direct, and at least the size of the pump suction connection. Larger suction piping is fine; in that case the manuals specify an eccentric reducer at the pump suction with the flat side on top. Why flat side up? Because the flat side keeps an air pocket from forming at the reducer crown, and air pockets are exactly what kills a centrifugal pump's prime. A concentric reducer at the suction is a classic installer mistake — it looks symmetrical, so it feels right, and it costs you a pump.
Straight run matters. The cited Lowara e-IXPS manual requires a straight, unrestricted suction-pipe section next to the unit equal to at least six times the suction-port diameter. That's not a universal rule for every pump on earth — it's specific to that manual — but the principle is general: turbulence upstream of the suction nozzle distorts the flow into the impeller, and a distorted inlet trades efficiency for vibration. If you're constrained on space, talk to the OEM about the actual minimum straight run they accept. Don't guess. And don't add an elbow to "make it fit" without checking what that does to the NPSH margin.
Suction-lift slope. For suction-lift installations, the cited Lowara manual specifies an upward slope toward the pump of greater than 2% to avoid air pockets. An air pocket in the suction line is not a cosmetic issue; it's a pump that loses prime every time the level drops below the pipe crown. A 2% slope sounds trivial until you measure it on a 10-meter run and realize the installer laid the pipe dead-level "because it's easier." That decision costs the operator a service call within the week.
Clean the line before you connect. Before connecting a pump to the system, remove welding residues, deposits, scale, and any other pipe contaminants that could damage the unit. Install a filter if necessary. Welding bead, a forgotten rag, a chunk of scale — any of those will go straight into the impeller or the mechanical seal the first time the pump runs. Mechanical seal installation preparation is mostly about what doesn't get into the seal chamber; a debris-free line is half of that. The cost of a strainer is trivial. The cost of a stripped impeller face is not.
Do not throttle on the suction side. Suction-side isolation valves exist for maintenance, not for flow control. Throttling flow with a suction valve can cause loss of prime, overheating, and pump damage — that's a direct warning in the cited Goulds manual, and it applies across most centrifugal pumps. If you need to control flow, do it on the discharge side. If the system designer put a suction block valve where it can't be anything but a flow control, the system design is wrong and the pump will pay for it.
Mechanical Alignment and Piping Stress Mitigation
Alignment is the step where the crews with the best tooling separate from the crews with the loudest confidence. A shaft alignment that reads "close enough" on a straightedge is not alignment. It's hope dressed up as measurement.
Align before piping. The pump and driver must be aligned before the suction and discharge piping are connected. That's not a stylistic preference — it's because piping loads on a freshly set unit will distort the baseplate and shift the alignment. The cited manufacturer manuals are unanimous: alignment must be verified again after piping is complete and the unit is bolted down, because shipment, piping loads, and even a new foundation can change alignment.
Tolerance is coupling- and machine-specific. There is no universal "X thousandths" alignment tolerance that applies to every pump. Allowable offset and angular misalignment depend on the coupling type, the operating speed, the thermal growth of the pump and driver, and the OEM's specifications. A flexible coupling with elastomeric element tolerates more than a rigid spacer coupling; a 3,600 RPM machine tolerates less than a 1,750 RPM machine at the same misalignment. Use the OEM's values. If your alignment tech quotes a tolerance without knowing the coupling make and the RPM, they don't know what they're doing — and they're about to put noise into your dial-indicator reading that they'll misread as "good enough."
Piping must not force the pump. Piping has to be independently supported and must line up naturally with the pump connections. Forcing suction or discharge piping into position is explicitly prohibited in the cited manufacturer manuals because it imposes load or strain on the pump. Pipe strain shows up later as a hot bearing, a worn seal face, a cracked baseplate, or a coupling that keeps shearing pins. None of those symptoms get blamed on the pipe fitter. They all get blamed on the pump.
Realignment after bolting and grouting. Once the unit is grouted, the foundation bolts are final-torqued, and the grout has cured, alignment has to be re-verified. Foundation movement under bolt preload, grout shrinkage, and pipe stress all conspire to move the shaft position. The sequence — level, bolt, grout, cure, realign, pipe, realign again — is the one that survives contact with reality. Skip a step and you'll be doing it anyway, just with a coupling in your hand.
| Stage | Alignment status | Why it matters |
|---|---|---|
| Before piping | Pump/driver aligned to OEM tolerance | Shipment and baseplate flex can shift the shafts off spec. |
| After piping connected | Re-verify alignment | Piping loads pull the baseplate into a new geometry. |
| After final bolt torque + grout cure | Final alignment check | Grout shrinkage and bolt preload settle the unit. |
| After first thermal cycle | Hot alignment check | Thermal growth of pump vs. driver shifts the running centerline. |
The crews that do all four checks don't usually have bearing failures in year one. The crews that skip step two always do.
Alignment is not a milestone you hit once. It's a measurement you re-verify every time the unit's geometry has a chance to change.
Safety Standards and Energy Isolation Procedures
I have yet to see a pump installation where shortcuts on energy isolation didn't almost kill somebody. The job is to install a rotating machine; the OSHA framework for servicing and maintenance applies the moment a worker puts a wrench on a coupling guard, a seal cover, or a drain plug. In practice, "servicing and maintenance" starts the second the unit is uncrated.
Lockout/tagout isn't paperwork, it's the rule. For U.S. general-industry servicing and maintenance, OSHA requires an energy-control program that isolates equipment from its energy source and renders it inoperative before work begins. The procedures aren't optional and they aren't vague: shutdown, isolation, control of stored energy, verification of de-energization, and restoration of energy in a defined sequence. "Verification of de-energization" is the part that gets skipped, usually because the worker is confident. Confidence is not a test instrument.
Stored energy is the trap. A pump that looks electrically isolated can still have a charged capacitor bank in the VFD, residual pressure in the discharge, hydraulic energy in the seal pot, thermal energy in a hot casing, and gravity-loaded check valves upstream that can backflow when the suction valve is opened. Each of those is a stored-energy source. Each one has a control step in a proper energy-control program. If your crew doesn't write those steps down, they don't actually know what they're controlling.
Guarding, warnings, and access. Coupling guards, belt guards, and hot-surface warnings aren't nice-to-haves. The 60°C threshold cited in one manufacturer manual is the line at which a casual touch becomes a burn injury; barrier guarding and warning labels are the design controls that prevent the casual touch in the first place. Cable entries, conduit seals, and hazardous-location classifications are not addressed in the pump manuals I've reviewed — those come from the electrical designer, the motor spec, and the local authority having jurisdiction. Do not assume the pump manual covers them. It doesn't.
Hot work and confined space. Welding near a freshly grouted baseplate, grinding inside a pit, or entering a sump to set a suction line all carry their own permit requirements. Pump installation routinely triggers hot-work permits, confined-space permits, and lifting plans. None of those are in the pump manual. They are in your site's EHS program, and they apply here the same way they apply to every other task.
The Verdict: Do This, Not That
Here's the blunt version.
Do this:
- Pour and cure the foundation before the pump arrives. Use engineered anchor-bolt specs, not "looks about right."
- Level with shims sized to the base-rail and the bolt diameter. Grout with high-precision non-shrinking grout only after leveling, bolting, and aligning.
- Locate the pump close to the source, above a drain or in a dry location, with service access on every side that needs it.
- Build the suction line short, direct, at least as large as the pump connection, with an eccentric reducer flat-side-up if you step the pipe size.
- Align the pump and driver before piping. Re-align after piping. Re-align after grout cure. Re-align after the first thermal cycle.
- Lock out, isolate stored energy, verify zero energy, every time, written down.
Not that:
- Don't bolt the pump down, walk away, and call it installed. Piping will move it.
- Don't use a concentric reducer on the suction, a suction block valve to throttle flow, or a suction line laid dead-level on a lift installation.
- Don't skip the energy-control program because the job is "just commissioning."
- Don't quote a universal alignment tolerance. Use the OEM's value for your coupling and your RPM.
- Don't pull foundation, anchor, grout, electrical, or seal-material specs out of the pump manual alone. Reconcile every one of them with the project engineer, the grout manufacturer's data sheet, and the OEM's certified drawing.
Industrial pump installation requirements checklists aren't bureaucracy. They're the sum of every failure mode somebody already paid to learn the hard way. I write them as audit patterns because that's how I think — and because the crews that follow them sleep better than the crews that don't.